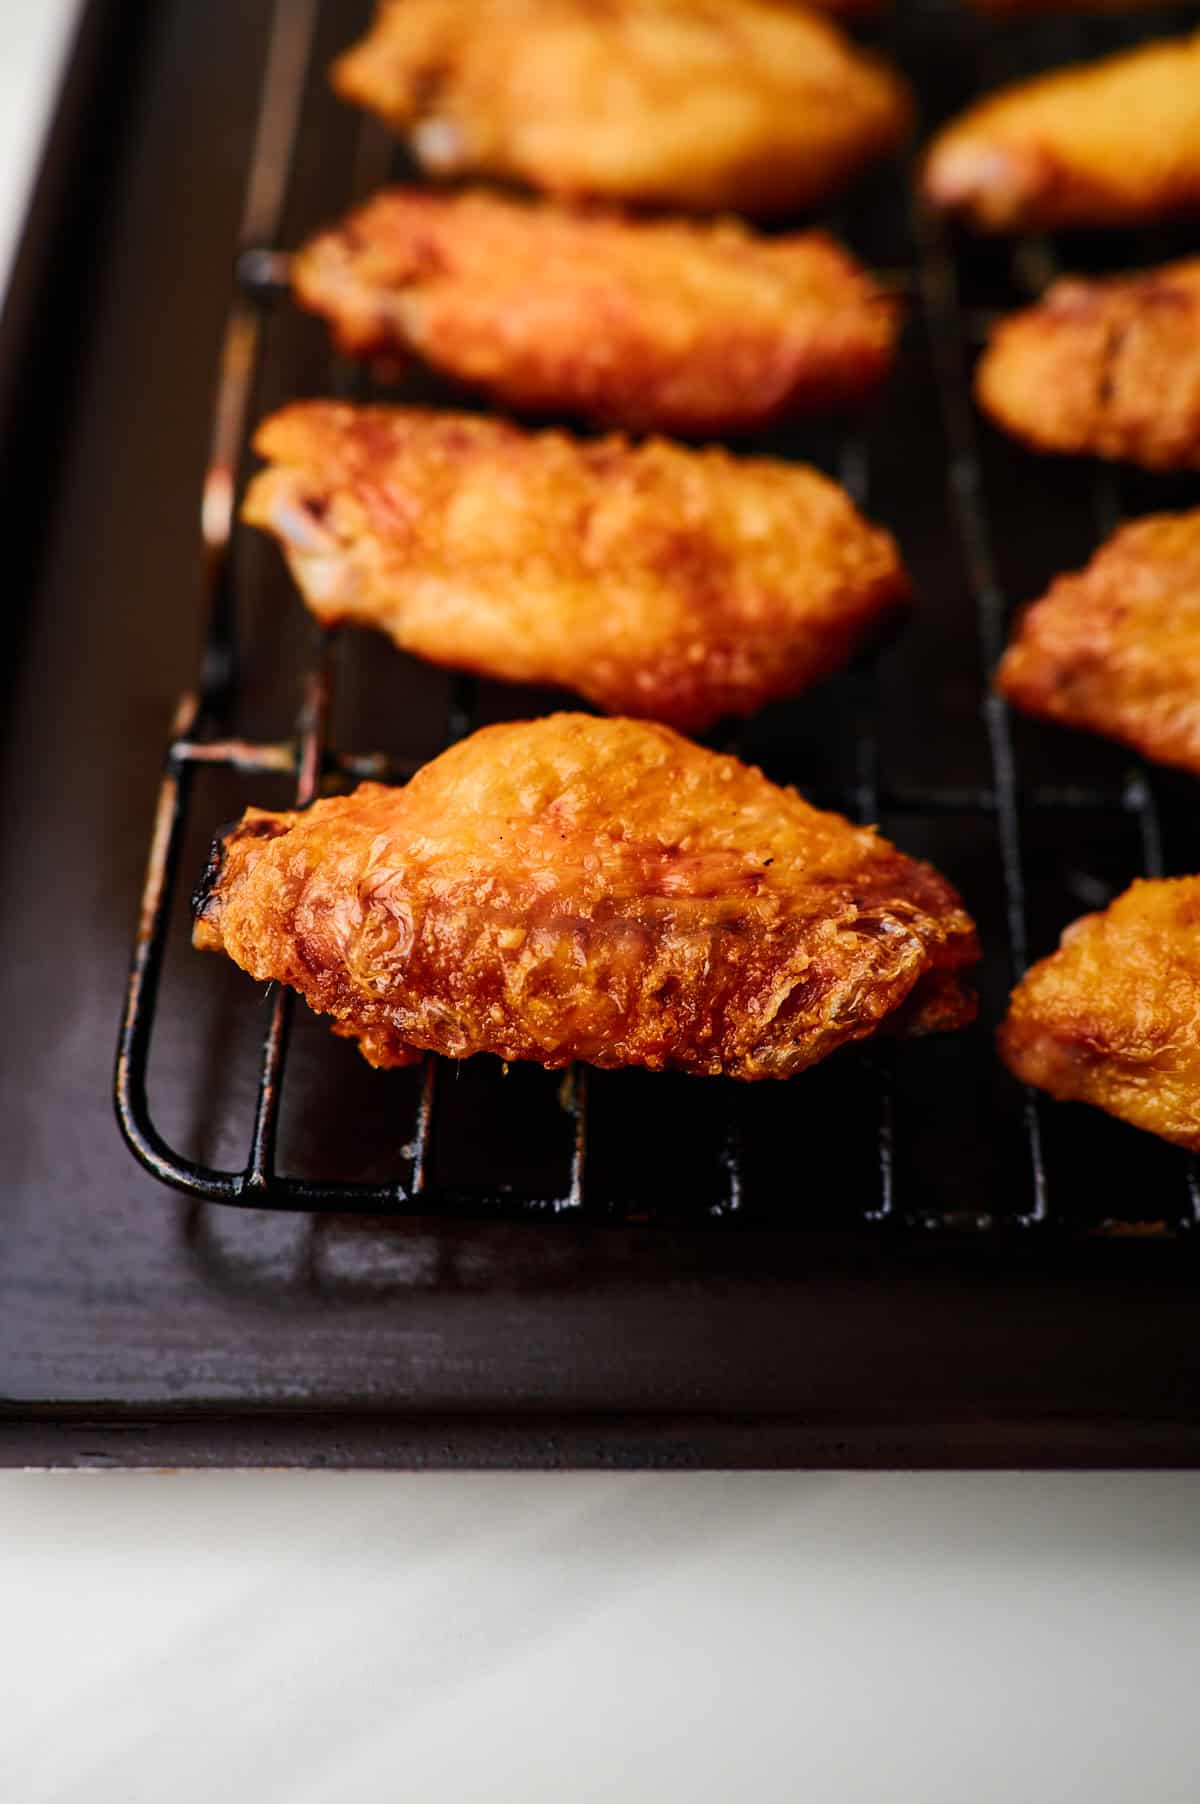
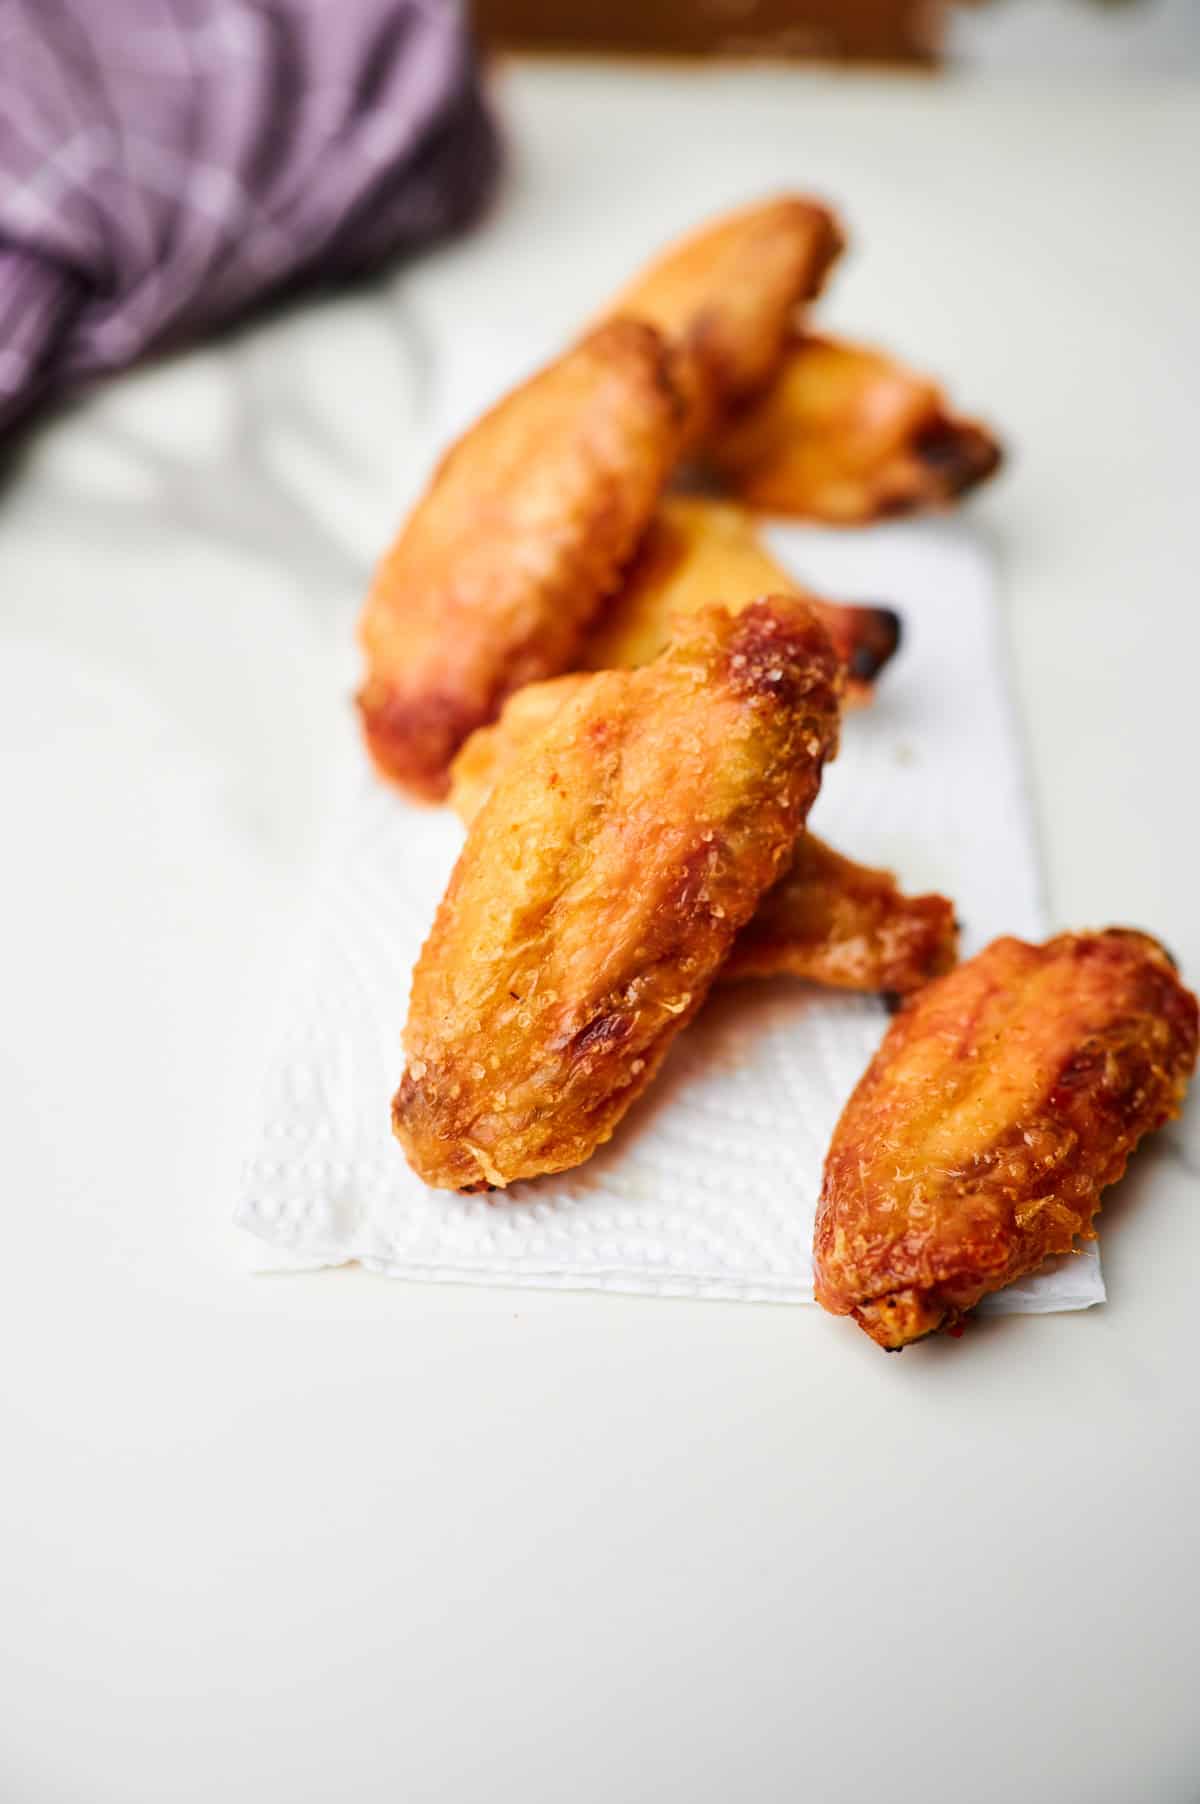
There are no false promises here; these crispy oven-baked wings are seriously crispy! You'll be surprised how simple they are to create. They truly taste like they've been deep-fried, with a thin, shatteringly crisp golden skin.
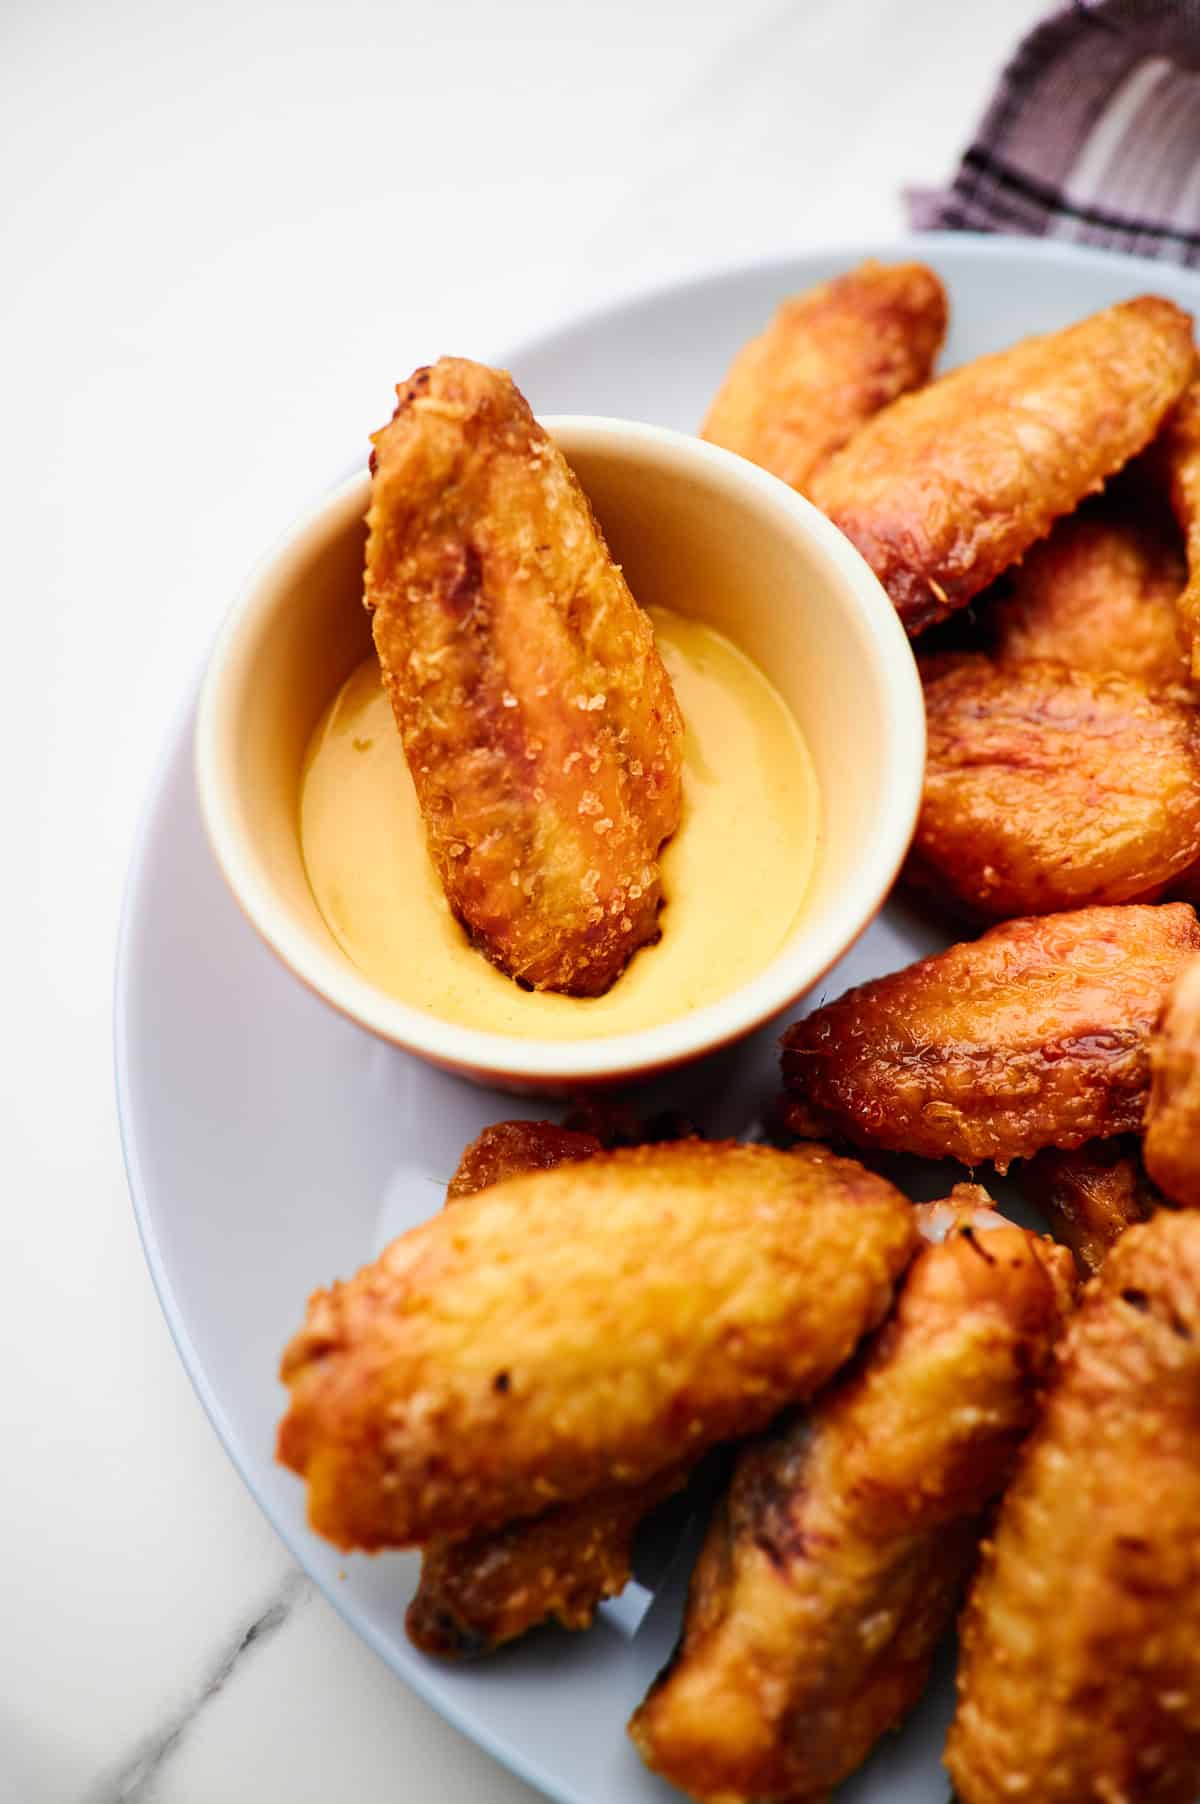
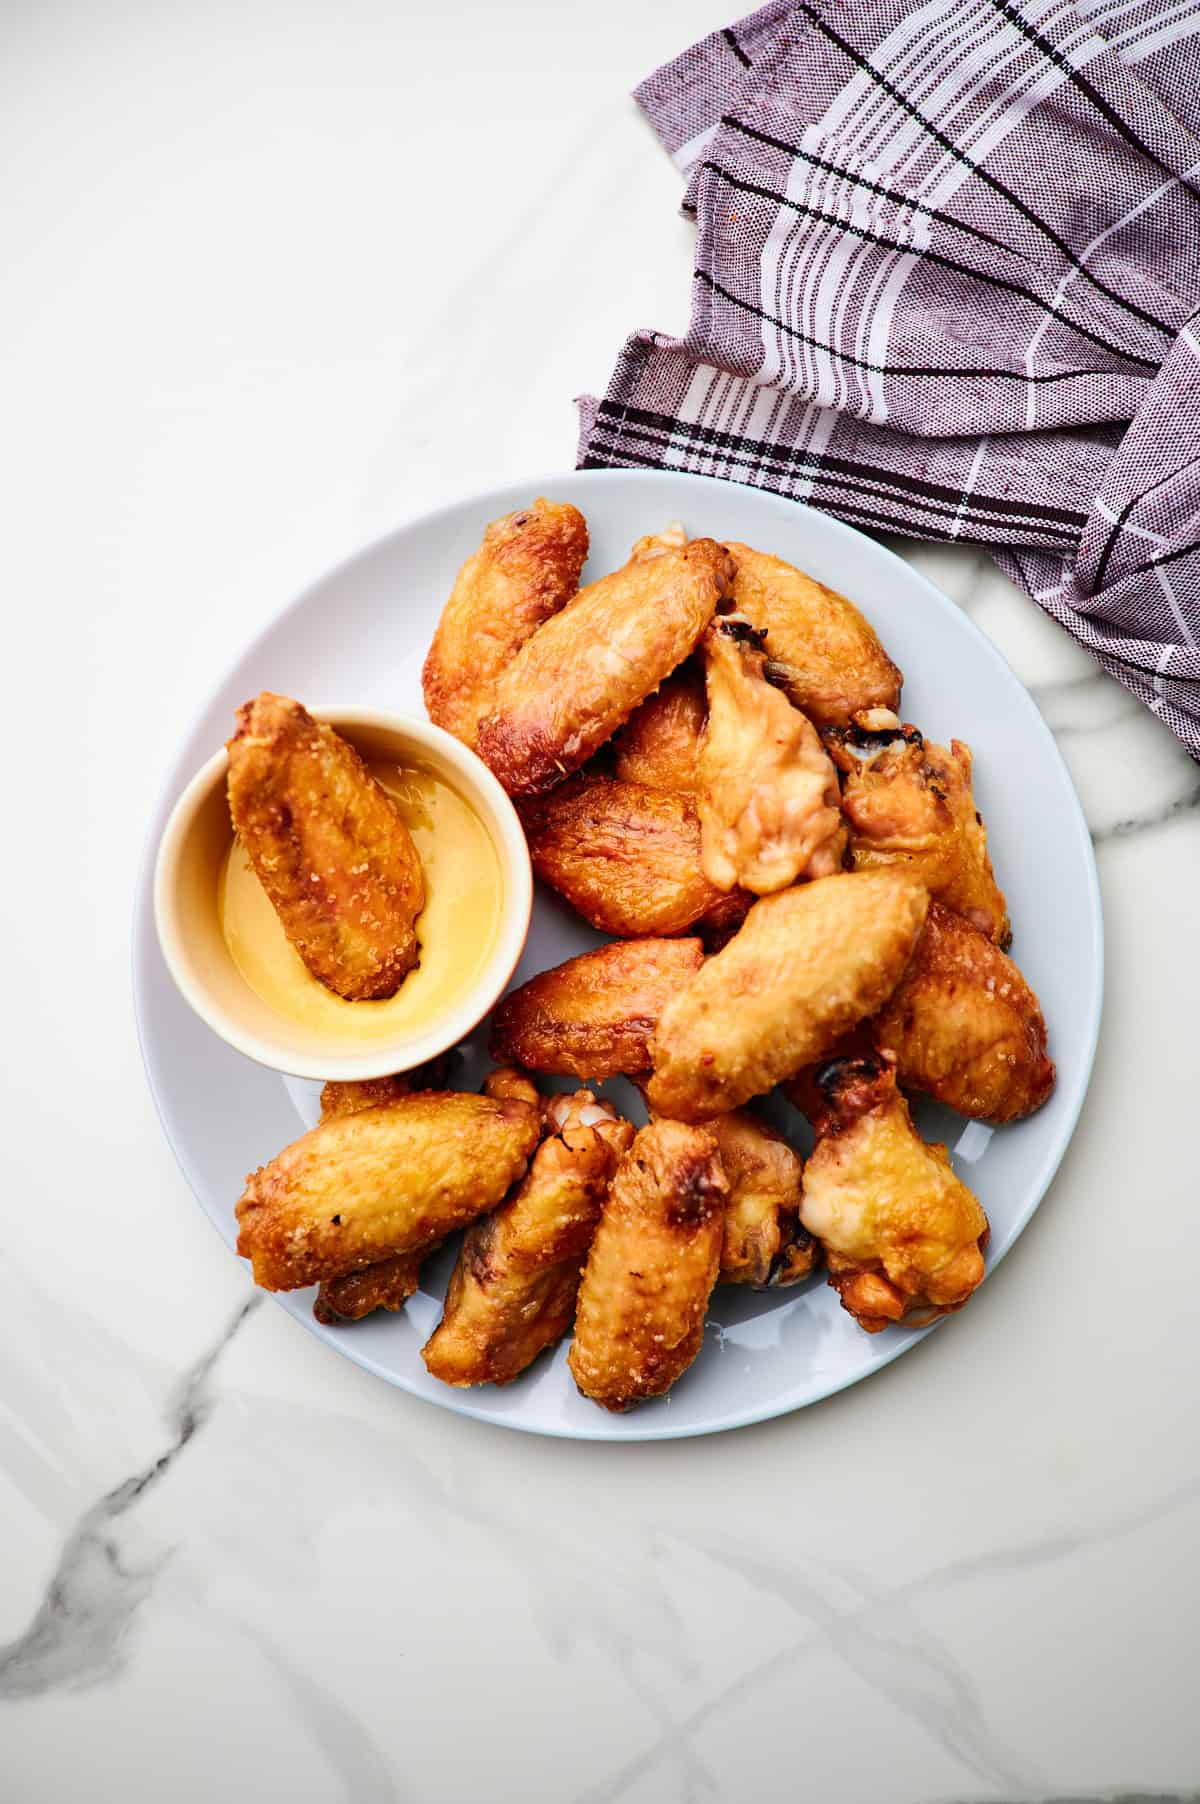
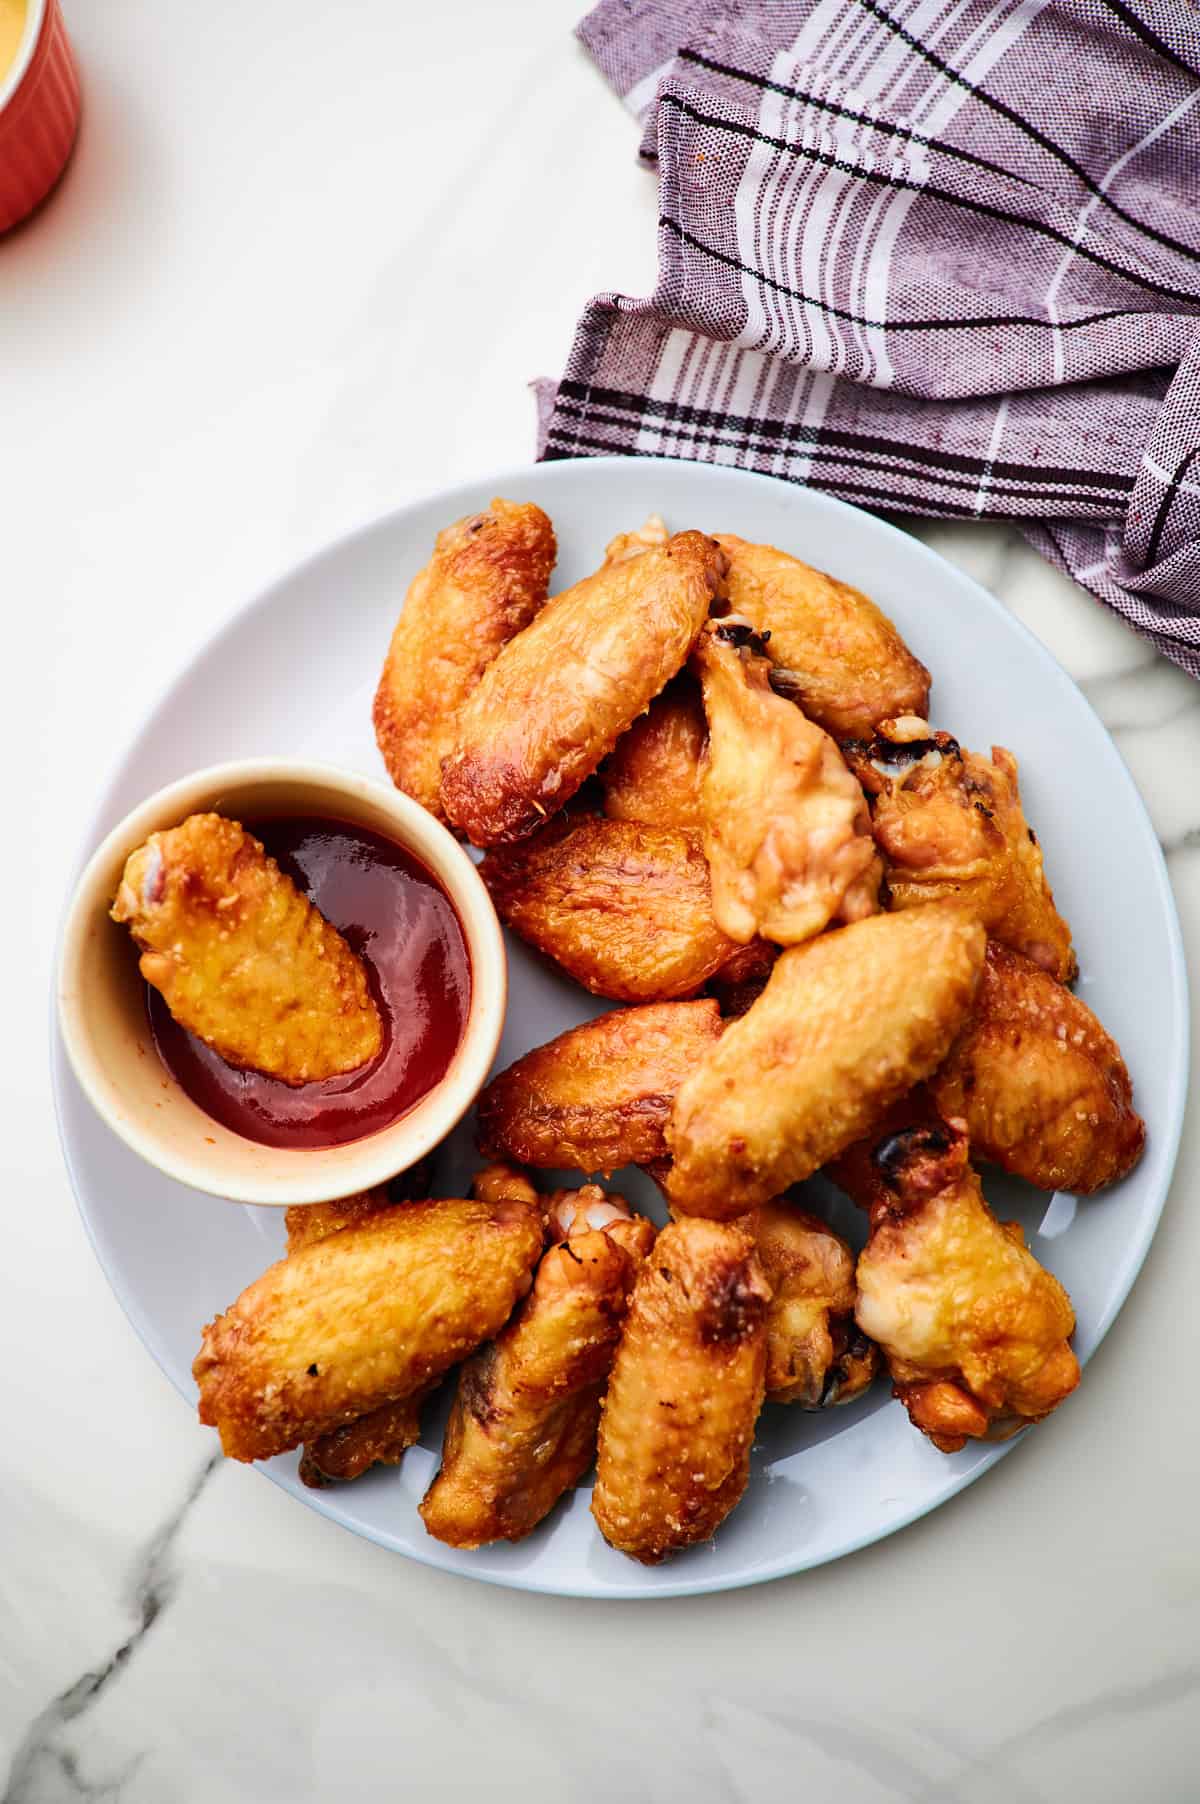
These are so delicious that they can be eaten without any accompaniment. Alternatively, throw them in your favorite sauce and offer it on the side. I've included a variety of sauces for these crispy baked wings in the recipe below!

Jump to:
Truly crispy oven baked wings
The brilliant people at Cook's Illustrated discovered this recipe for Crispy Oven Baked Wings. As a food nerd, I truly appreciate how Cook's Illustrated breaks down the science underlying their methods.
And I genuinely think this is one of their greatest recipes ever, especially considering how very simple it is! And I'm going to tell you the secret today. Are you prepared? 🙂
Ingredients Needed
This basic dish calls for only a few ingredients. Here are the major items you'll need:
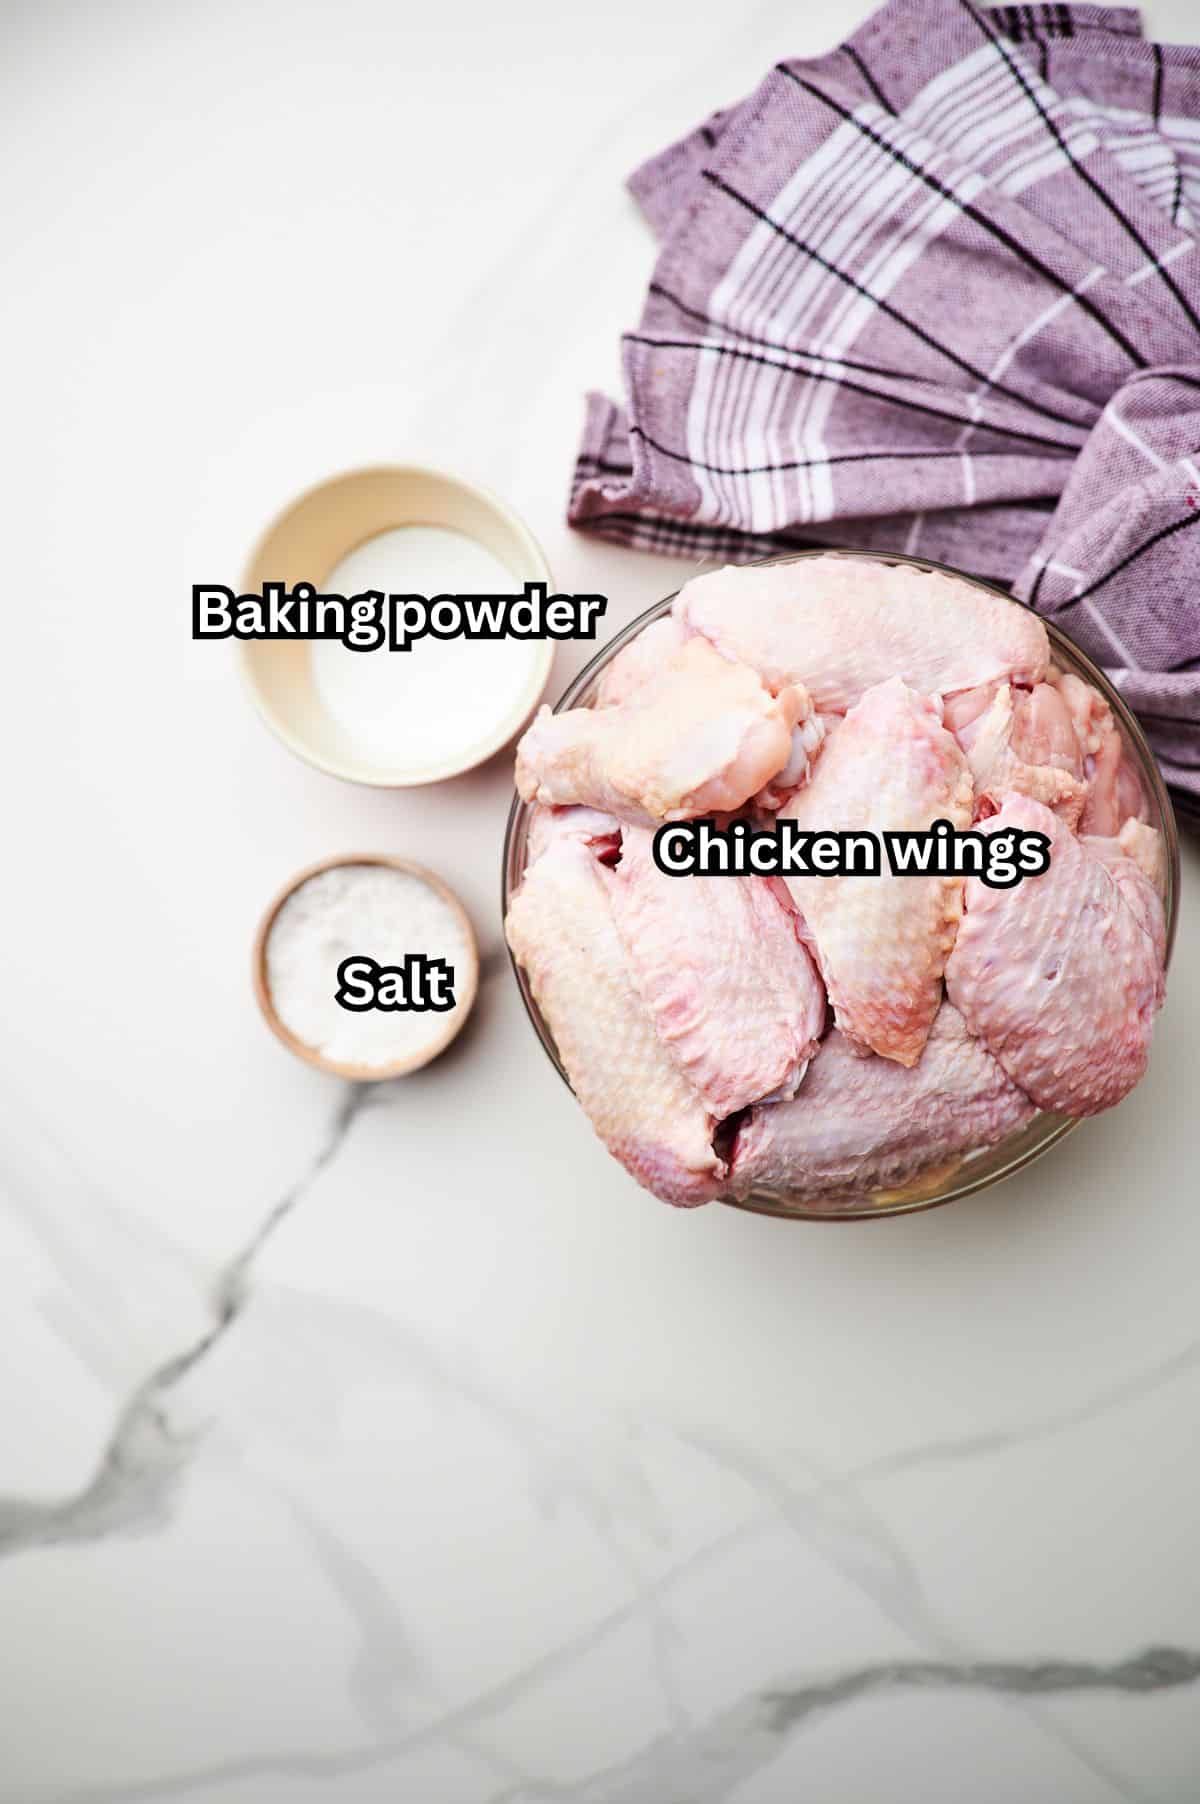
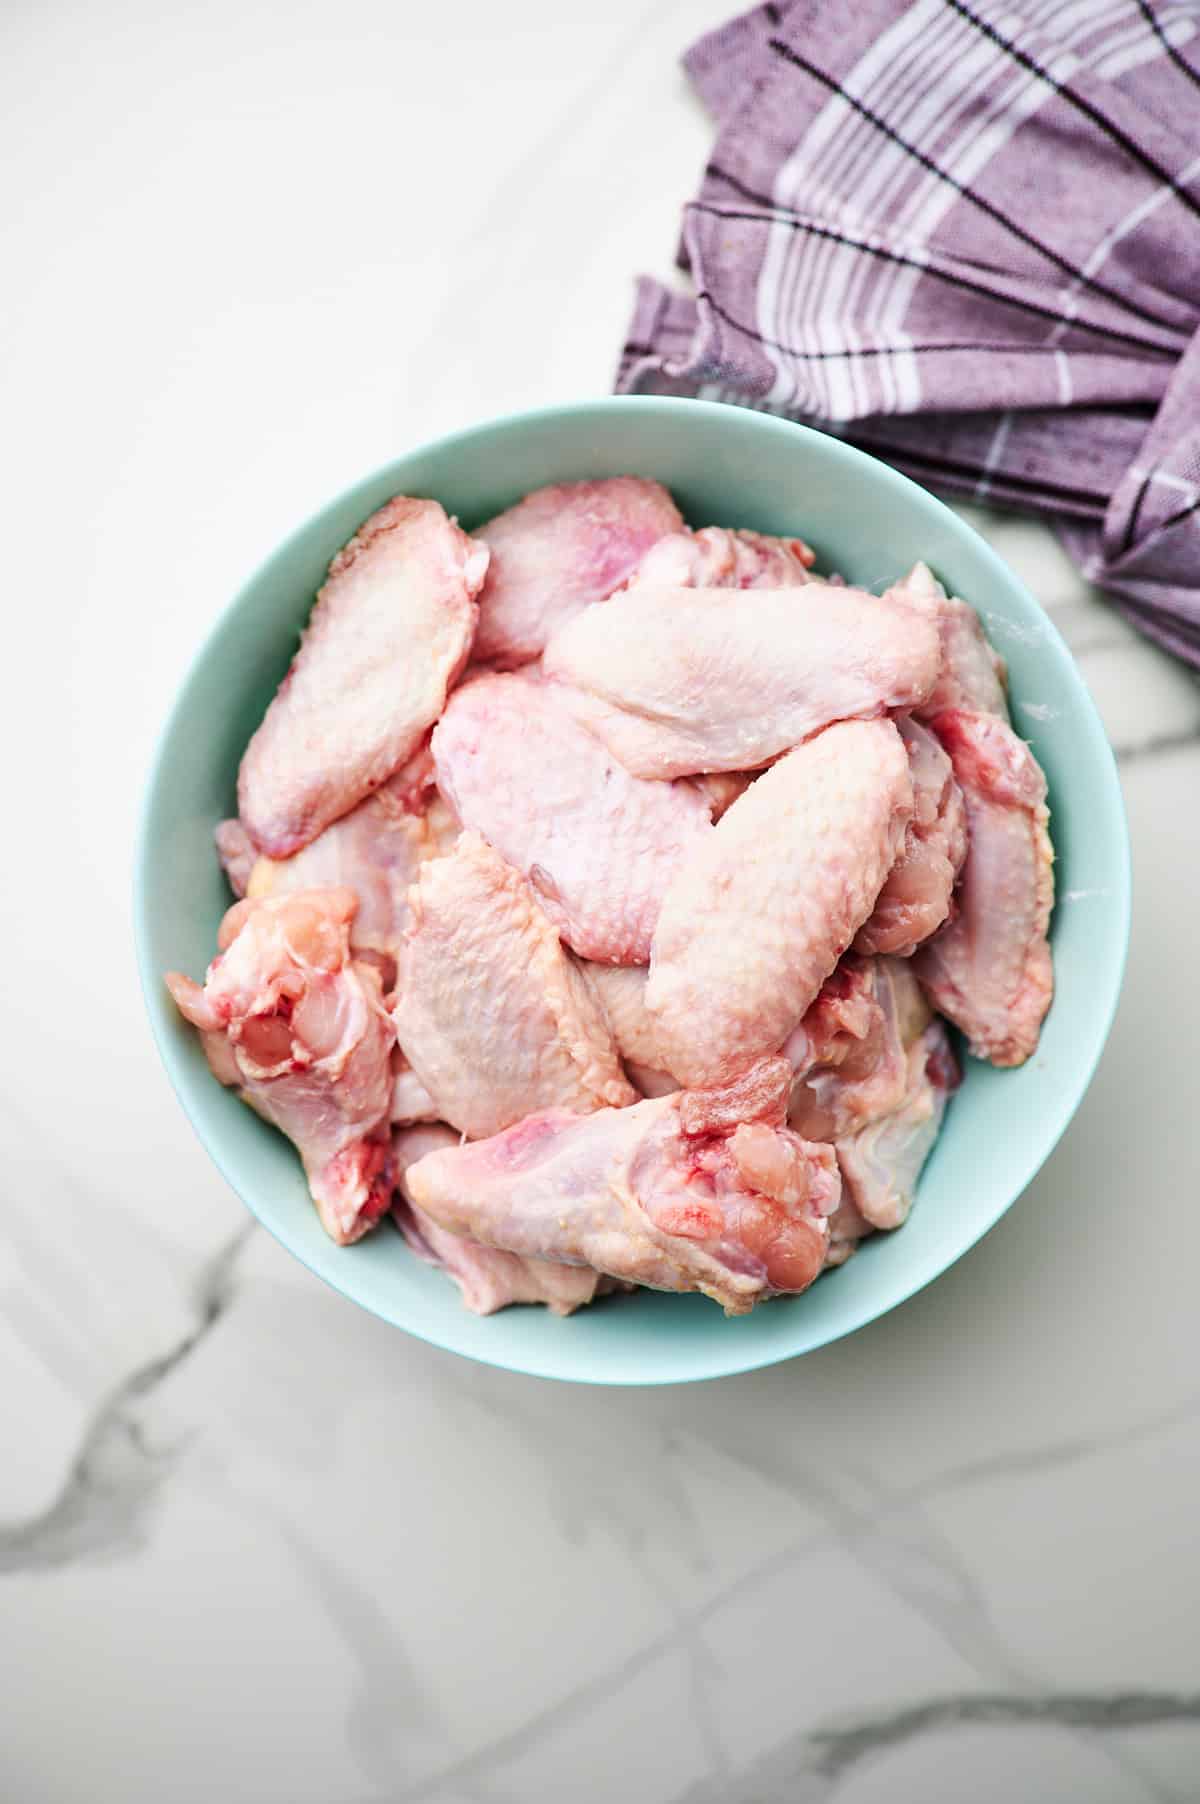
- Chicken wings: I prefer party wings, which are entire wings with the wingtips removed. They're easier to consume because they're already pre-cut into drumettes and wingettes.
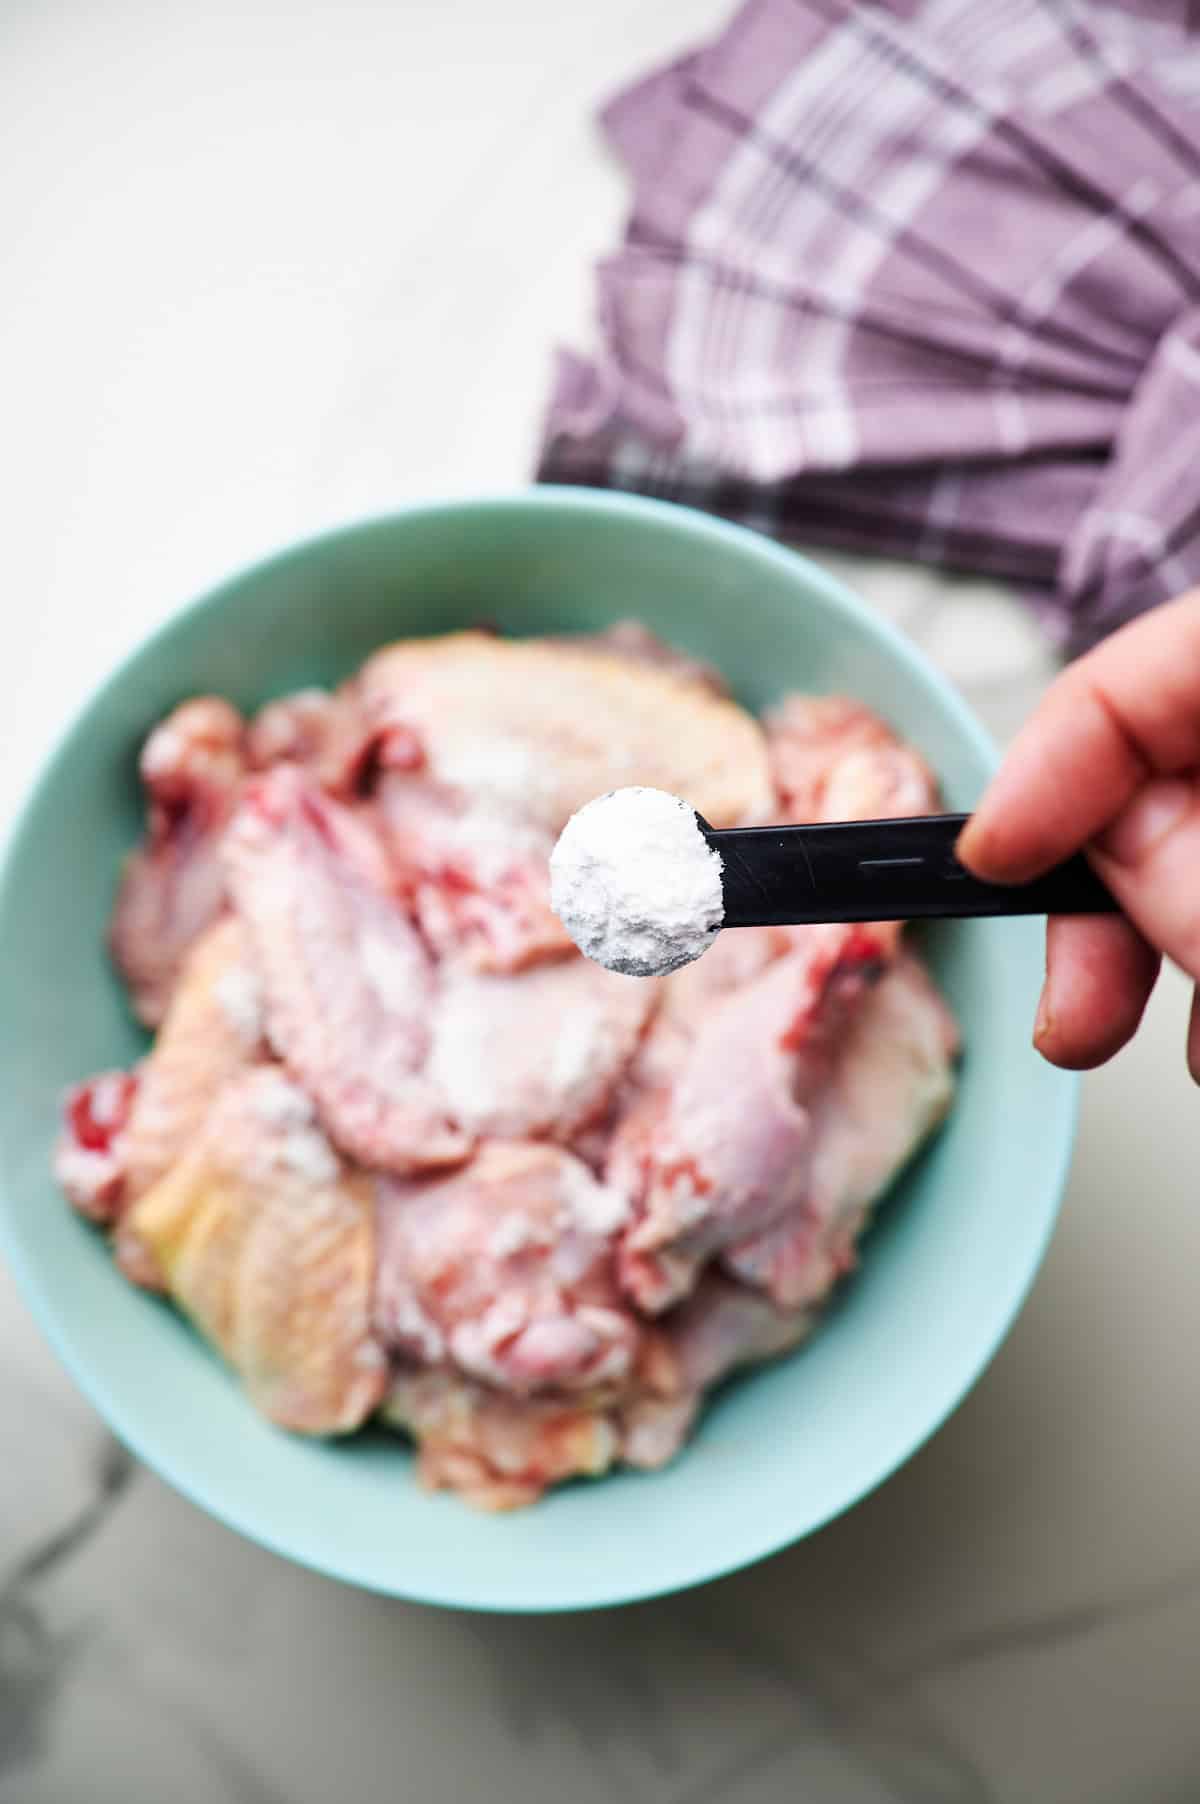
- Use baking powder instead of baking soda or bicarb soda. This secret ingredient produces crispy skin without the need to bread the wings first.
- Salt.To taste.
- Oil spray
How to make crispy oven baked wings
Three simple techniques to make crispy oven-baked wings:
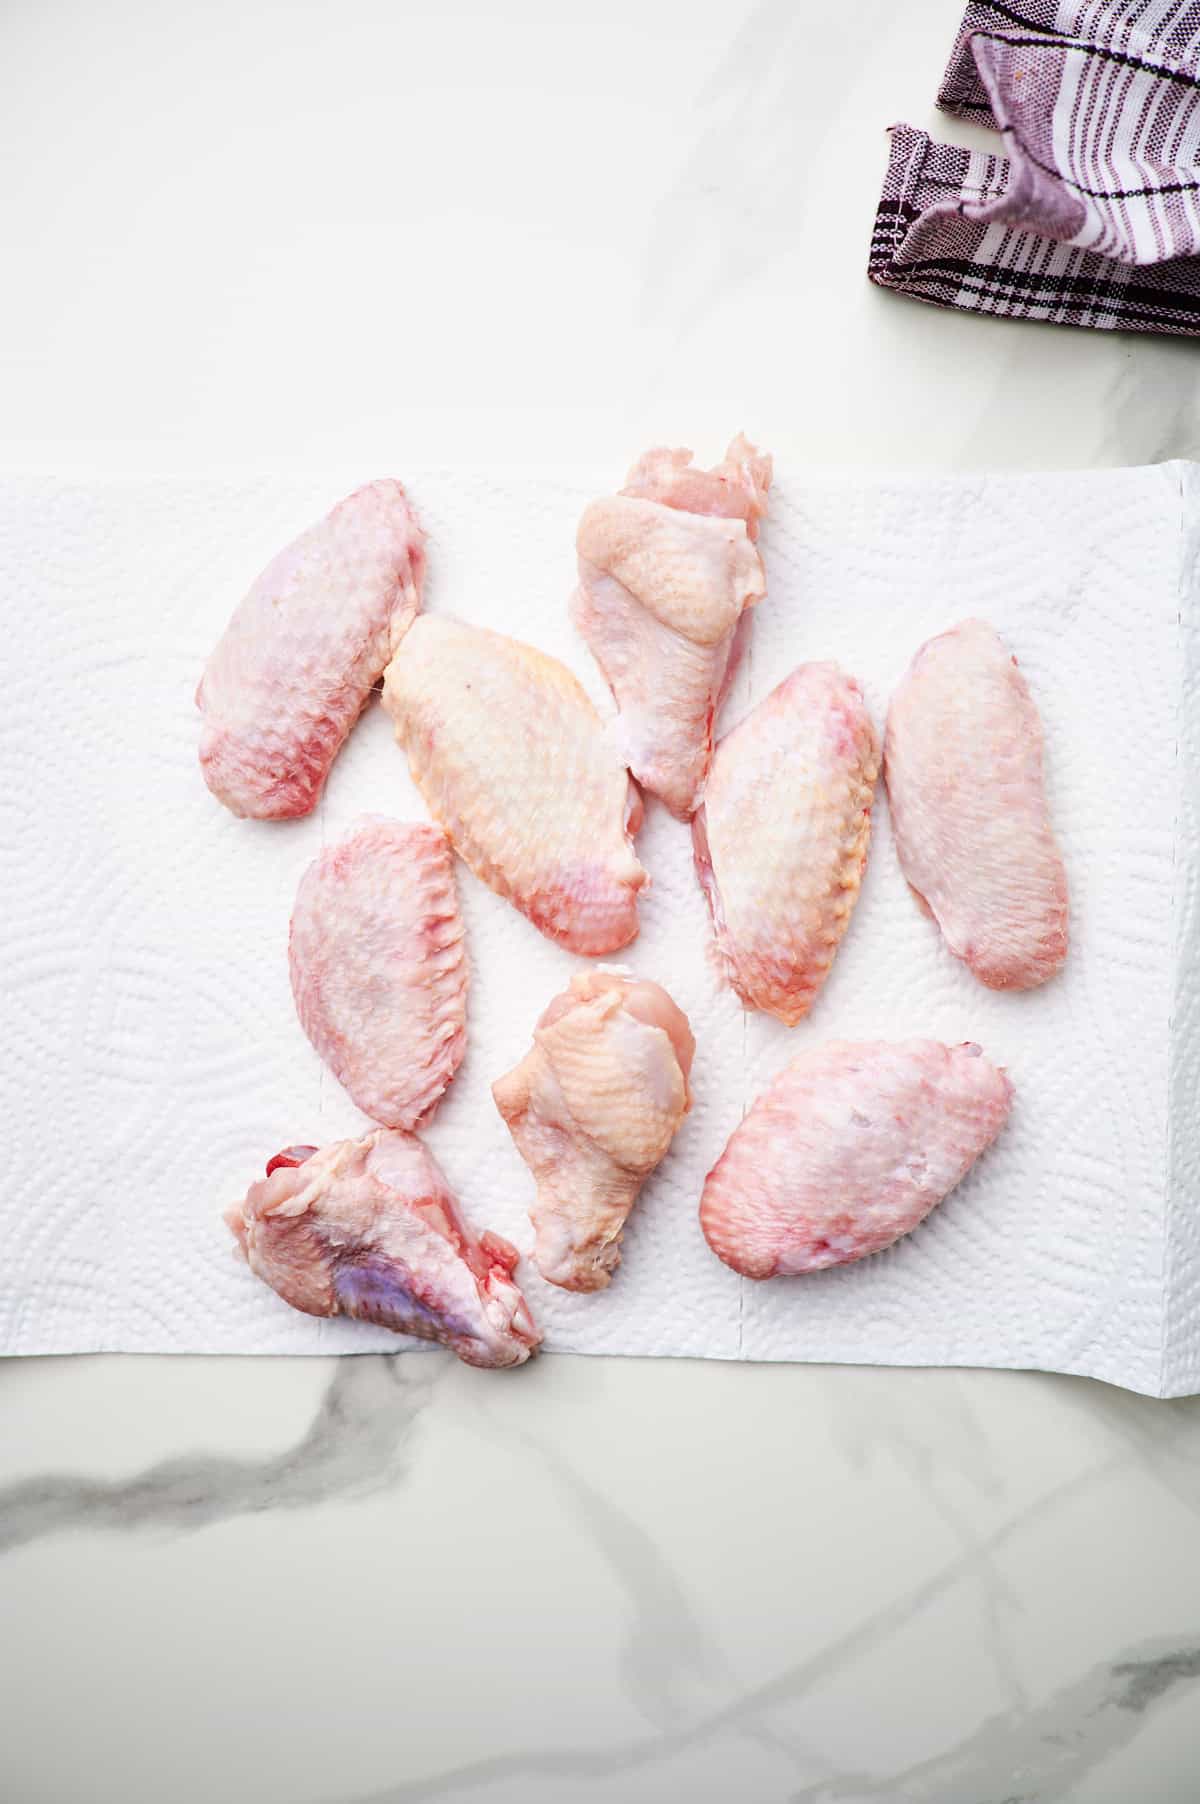
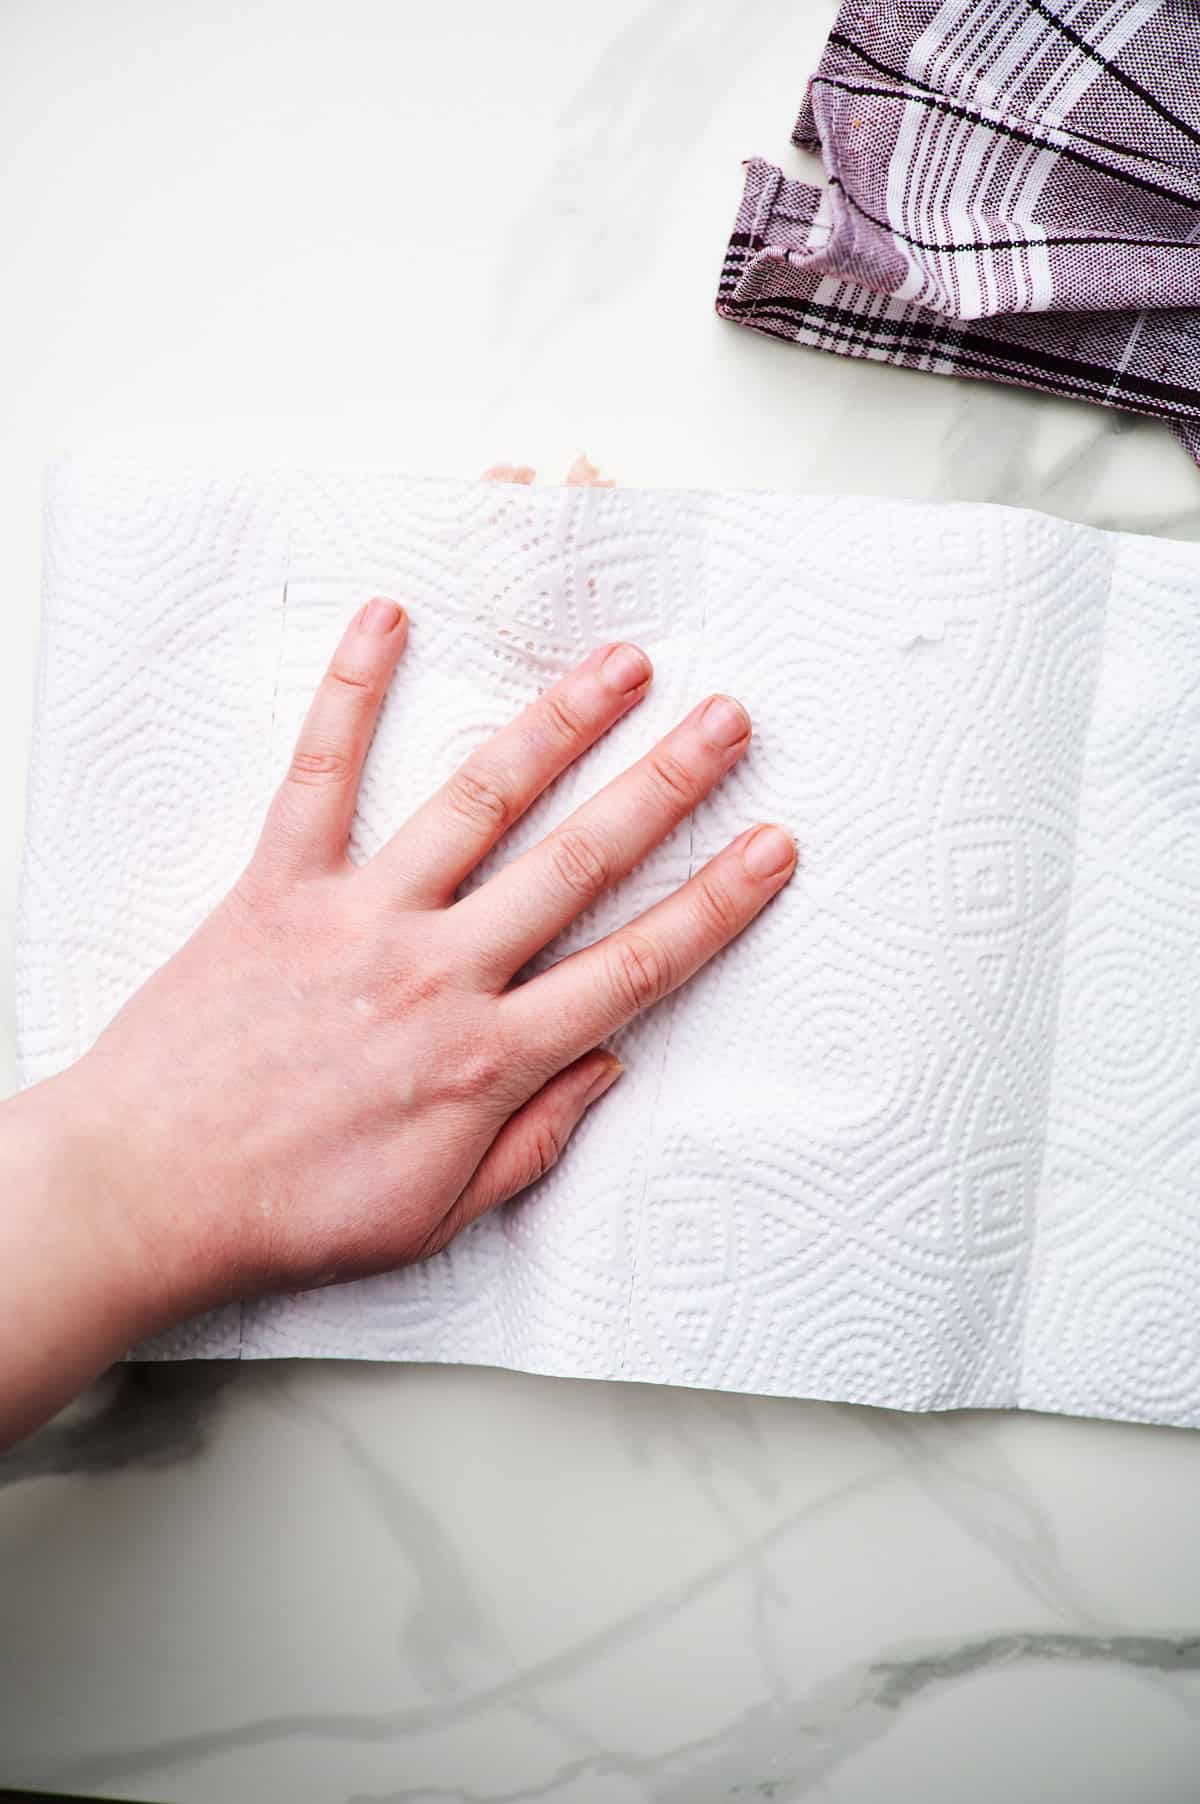
- Use paper towels to pat wings dry;
- Mix wings with salt and baking powder;
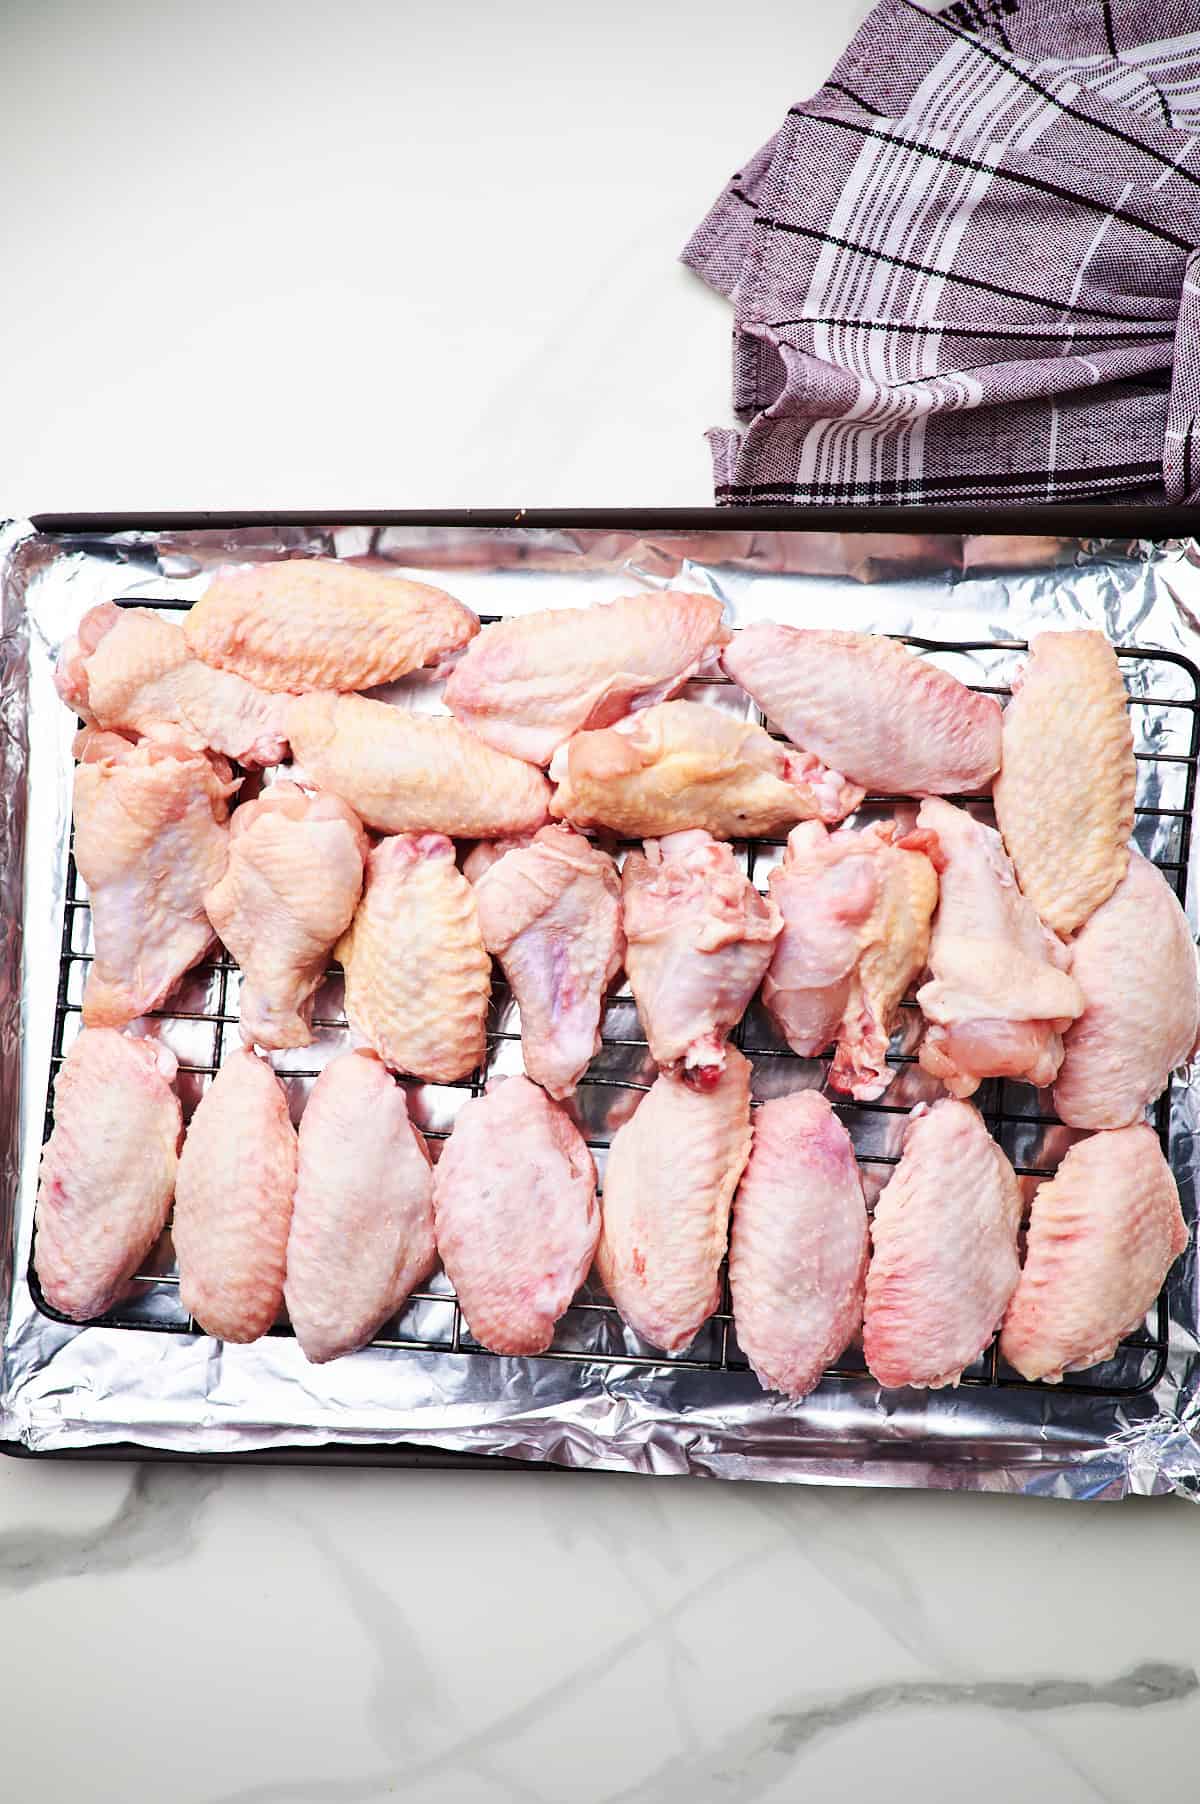
- Bake for 30 minutes at 120°C/250°F, then for 40 to 50 minutes at 220°C/425°F, or until golden brown and crispy.
That's it, indeed. That's the only thing to it. 🙂
Why this recipe works
Two crucial ingredients are included in those three easy steps to create these genuinely crispy oven-baked wings:
- Apply a layer of baking powder—yes, baking powder! I won't get into all the details, but to put it briefly, the baking powder makes the skin crispier by drawing moisture to the skin's surface for evaporation; and
- To crisp up the skin, bake in a very hot oven for 30 minutes on low to melt the fat. There are numerous scientific explanations for this, but I won't bother you with them. In essence, the wings are baked for 30 minutes at a very low temperature on the lowest shelf of the oven, which causes the fat beneath the skin to "melt." After that, the wings are moved to the top shelf and the heat is increased, which crisps up the skin. Making sure the wings are dry is the second piece of advice. Place the wings on the rack and leave them in the refrigerator overnight, uncovered, if you're well-organized. But since I'm not organized enough or have enough room in the refrigerator, I just use paper towels to dry them (see photo below for how I do this).
You can immediately "hear" how crispy the skin is when you tap it with your finger after these are taken out of the oven. They even have a fried appearance! You don't taste baking powder at all, in case you were wondering.
Have inquiries? See the recipe card's FAQ.
The wings will appear smaller than you are accustomed to. You'll notice that a large amount of the fat beneath the skin melts off the wings and collects on the plate. Thus, these also have the added advantage of being lower in calories!
You can serve the sauce alongside the wings or toss them in your preferred sauce. I've listed a couple basic sauces that I prefer to serve wings with in this recipe: Ranch Dipping Sauce, Honey Mustard Sauce, and Honey Garlic Sauce.
Come on, let's dive into these wings!
Frequently asked questions
The bottom of the wings that come into touch with the tray will be greasy, but the skin will still be crispy. This is due to the rack's function of raising the wings off the tray so that the chicken fat can fall.
To avoid an oily underside, remove the wings from the high-temperature cooking after about 35 minutes. After draining the tray's oil, put it back in the oven to complete browning and crisping. Before serving, you might also use paper towels to drain the wings of any extra oil.
As long as the wings are warm, which is about 20 to 30 minutes, these will remain crispy. The skin then begins to soften and wrinkle. But I was astonished at how well they reheated! Simply leave the wings uncovered to cool, then cover and place in the refrigerator. Place the wings skin side up on the tray and bake them at 200C/390F for 5 to 8 minutes. Similar to when they were freshly cooked, the skin becomes smoother and more puffed. My buddies never notice when I reheat, thus the only people who will notice the difference in juiciness and crispiness are you (if you've made as many wings as I have!) and genuine Wings specialists.
After adding the sauce, the skin remains crispy for about 10 to 15 minutes before beginning to soften but not become mushy, which can last for up to 30 minutes. They become soggy if you reheat them after adding the sauce.
Please do not add the baking powder and then freeze or chill; this may cause the wings to sweat too much to crisp.
You certainly can! Although it slightly lessens the actual crispiness of the skin, the additional seasonings and spices create a crust that gives it more snap. I tested this extensively, and I can tell you that it functions incredibly well!
Some readers have experienced this issue, but I don't believe it's related to the chicken wings because I've produced an absurd number of them—both in my kitchen and for other people—and have never experienced it. One of the following could be the issue: a) chicken fat spilling onto the oven burners during the move from the lower to the upper shelf, or b) fat already present on the oven burners. There is nothing else that comes to mind. Although chicken fat has a lower smoke point than the high oven temperature employed in this recipe, the fat is protected by all of the wings and diluted by the chicken juices that drip into it, so it does not come into direct contact with the heat.
Really! The underside will become crispy even without a rack.
Yes, but just the skin will benefit from the crispiness. Because wings are nearly completely covered in skin, it functions best on them. When raw, the skin of drumsticks, thighs, and breasts is not completely covered, and it shrinks during cooking. However, the method itself is quite effective! Because there is less skin surface area for drumsticks or other chicken cuts weighing 1 kg or 2 lbs, use ¼ teaspoon salt and 2 teaspoon baking powder, which is less than what is needed for wings.
If you tried this Truly Crispy Oven Baked Chicken Wings or any other recipe on my website, please feel free to leave a 🌟 star rating and let me know how it goes in the 📝 comments below. And remember to tag me on Instagram!
More Easy Chicken Recipes
- 10 Minute Copycat Taco Bell Chicken Quesadilla
- Mayonnaise Parmesan Chicken
- Blackstone Chicken (Easy Griddle Recipe)
- Crispy Honey Chicken
- Buffalo Wild Wings CrockPot Garlic Parmesan Chicken Pasta Recipe
- Crockpot Garlic Parmesan Chicken and Potatoes
- Greek Yogurt Marinated Chicken
- The Best Crispy Chicken Parmesan
- 30-Minute Grilled Buffalo Chicken
- Oven Baked Juicy Panko Chicken
- Easy Oven Baked Chicken Cutlets
- Oven Baked Thin Sliced Chicken Breasts
- Mediterranean Chicken & Rice Bowls (SUPER Easy!)
- Crockpot Cheesy Chicken Broccoli And Rice Casserole
- Grilled Boneless Chicken Thighs
- Weeknight Cream of Mushroom Chicken Skillet
- One-Pot Spanish Chicken And Yellow Rice Recipe
- Dump and Bake Chicken Alfredo Casserole
Recipe

Truly Crispy Oven Baked Chicken Wings
INGREDIENTS
Crispy Wings
- 1.5 kg chicken wings cut into wingettes
- 4 teaspoons baking powder NOT BAKING SODA
- 1 teaspoon salt
- Oil spray
INSTRUCTIONS
Crispy Wings
- Unwrap the chicken wings and let them dry in the refrigerator for a couple of hours if you're well-organized. Otherwise, blot the wings dry with a paper towel.
- Lower-middle and upper-middle oven rack positions should be set.
- Preheat all oven types (fan, convection, and conventional) to 250F/120C.
- Lay a rack (such as a cooling rack) on the foil after lining a baking tray with it. Apply oil spray to the rack.
- Put the wings in a ziplock bag or a big dish. Toss to ensure consistent coating after adding the baking powder and salt.
- Arrange the wings, skin side up, in a single layer on the baking tray. All they need to do is fit snuggly. Don't worry if they appear too tight; they will shrink as the fat drains out during cooking.
- After placing the wings on the bottom center oven rack, roast them for half an hour.
- Raise the oven temperature to 425F/220C and move the wings to the upper middle rack. Bake, rotating the tray halfway through, for 40 to 50 minutes.
- After taking the baking tray out of the oven, leave it for five minutes.
- Serve the wings with their preferred sauce on the side for dipping or drizzling, or toss them in it.
NOTES
Check out the frequently asked questions included beneath the recipe. 1. The wings need to be thawed!
I purchase my wings already cut. The recipe does not work as well with entire wings, so you will need to break them up if you have them. For a detailed tutorial on chopping wings, click this link.
2. When the wings are taken out of the oven, you will see that they are smaller than normal. This occurs as a result of the fat beneath the skin melting off (rendering out) when baked in a low oven.
3. You must leave the wings in the oven for at least an hour in order for them to roast to a dark golden brown. They get golden brown when baked. When the skin is nice and crispy, you'll know they're done. 4.To reheat (for further information, read the FAQ below): Let cool, then cover and store in the refrigerator. The skin will soften and wrinkle. Turn the oven on to 200°C (390°F). Place the wings skin side up on the tray and bake for 5 to 8 minutes, or until the skin swells up and the wrinkles disappear, allowing the wings to crisp up once more.
5.SAUCES: * Honey Garlic Sauce: Combine 4 tablespoons honey, 2 tablespoons soy sauce, 2 tablespoons white vinegar (or substitute any other vinegar outside balsamic), and two to three chopped garlic cloves. * Honey Mustard Sauce: ¼ cup Dijon mustard, ¼ cup mayonnaise; can be used for tossing or dipping. One-fourth cup honey
* Spicy Creamy Dipping Sauce: ¾ cup mayo, ½ tso garlic powder, ⅛ teaspoon paprika, 3-4 tablespoon sriracha, salt & pepper to taste; * Ranch Dipping Sauce: Combine ⅓ cup mayonnaise, ⅓ cup sour cream, 2 tablespoons milk, 1 teaspoon lemon juice, ¼ teaspoon EACH dried dill, parsley, chives, onion, and garlic powder.
* Pink Sauce: 1 tablespoon sriracha (or other spicy sauce), 2 tablespoons sweet chilli sauce, 2 tablespoons ketchup, 2 tablespoons garlic powder, and ½ cup mayonnaise


Paula says
Where’s the clip to cut the wings??